Crafting a Timeless Treasure: Building a Wooden Jewellery Box
Related Articles: Crafting a Timeless Treasure: Building a Wooden Jewellery Box
Introduction
In this auspicious occasion, we are delighted to delve into the intriguing topic related to Crafting a Timeless Treasure: Building a Wooden Jewellery Box. Let’s weave interesting information and offer fresh perspectives to the readers.
Table of Content
Crafting a Timeless Treasure: Building a Wooden Jewellery Box
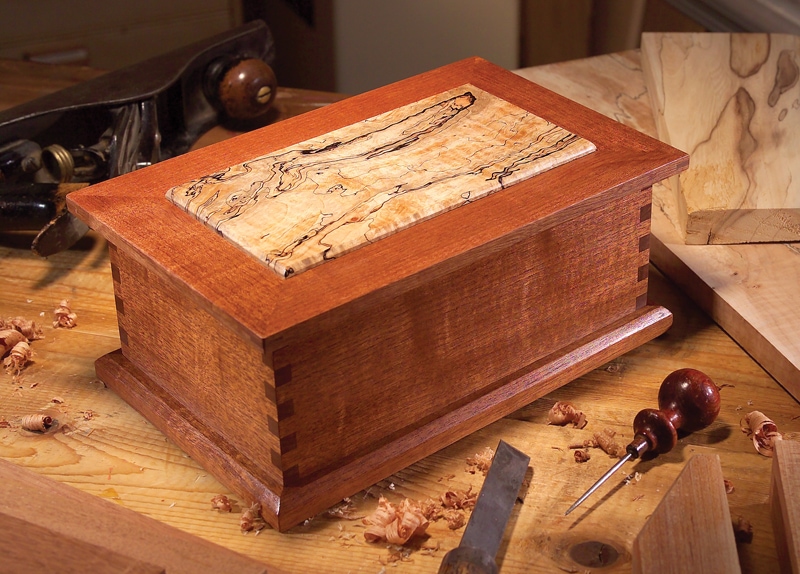
A wooden jewellery box is more than just a storage solution; it is a testament to craftsmanship, a vessel for precious memories, and a cherished piece of home decor. The act of creating one from scratch imbues the box with a unique personal touch, making it a truly special gift or a treasured heirloom.
This comprehensive guide will walk you through the process of building a wooden jewellery box, from selecting materials to finishing touches. Whether you are a seasoned woodworker or a curious beginner, this step-by-step approach will equip you with the knowledge and confidence to craft a beautiful and functional piece.
Choosing the Right Wood
The first step in building a wooden jewellery box is selecting the right wood. The ideal wood for this project should be:
- Durable: It should be able to withstand the weight of jewellery and resist scratches and dents.
- Easy to work with: It should be readily available and easy to cut, shape, and sand.
- Aesthetically pleasing: It should have a beautiful grain pattern and finish well.
Some popular wood choices for jewellery boxes include:
- Cherry: Known for its rich reddish-brown color and beautiful grain pattern, cherry wood is a classic choice for furniture and decorative items.
- Maple: With its light color and tight grain, maple wood is a durable and versatile option that can be stained to achieve a variety of finishes.
- Walnut: This wood boasts a dark brown color with distinctive dark streaks, adding a touch of elegance and sophistication.
- Oak: A strong and sturdy wood with a prominent grain pattern, oak is a reliable choice for furniture and decorative items.
- Pine: An affordable and readily available option, pine is soft and easy to work with, making it suitable for beginners.
Designing the Jewellery Box
Once you have chosen your wood, it is time to design your jewellery box. Consider the following factors:
- Size: Determine the desired dimensions of your box based on the size and quantity of jewellery you intend to store.
- Shape: Choose a shape that suits your aesthetic preferences. Common shapes include rectangular, square, and circular.
- Features: Consider adding features such as compartments, drawers, or a mirror to enhance the functionality and appeal of your box.
- Style: Decide on the overall style of your jewellery box. Do you prefer a simple and minimalist design or something more intricate and ornate?
Gathering the Tools and Materials
Before you begin building your jewellery box, ensure you have the necessary tools and materials:
- Wood: Choose your preferred wood type based on the factors discussed previously.
- Woodworking tools: This includes a saw, drill, sander, chisel, and hammer.
- Measuring tools: A ruler, tape measure, and protractor are essential for accurate measurements.
- Fasteners: Screws, nails, and glue will be needed to assemble the box.
- Finishing supplies: Sandpaper, wood filler, stain, varnish, and paint are required to create a smooth and protective finish.
- Hardware: Hinges, latches, and handles are needed for functionality and aesthetics.
Building the Jewellery Box
Now comes the exciting part – building your jewellery box. Follow these steps carefully:
- Cut the wood: Use your saw to cut the wood into the desired dimensions for the box’s base, sides, lid, and any other components.
- Join the pieces: Use glue, screws, or nails to join the pieces together. Make sure the joints are tight and secure.
- Sand the box: Use sandpaper to smooth out any rough edges and create a smooth surface for finishing.
- Add features: If you are incorporating features such as compartments or drawers, construct and attach them at this stage.
- Apply finish: Apply stain, varnish, or paint to the box according to your desired finish. Allow the finish to dry completely before proceeding.
- Attach hardware: Install hinges, latches, and handles to complete the functionality of your box.
Tips for Building a Beautiful Jewellery Box
- Plan ahead: Carefully design and measure your box before you start cutting wood.
- Use quality materials: Choose high-quality wood and hardware for a durable and aesthetically pleasing box.
- Take your time: Do not rush the process. Allow ample time for each step to ensure a well-crafted box.
- Pay attention to detail: Take pride in your work and pay attention to the finer details, such as sanding and finishing.
- Personalize your box: Add your own unique touches to make your jewellery box truly special. This could include carving initials, adding decorative accents, or using a specific type of wood that holds personal significance.
FAQs about Building a Wooden Jewellery Box
Q: What kind of wood is best for a jewellery box?
A: Any durable hardwood that is easy to work with is suitable for a jewellery box. Cherry, maple, walnut, and oak are popular choices for their beauty and durability.
Q: How do I choose the right size for my jewellery box?
A: Consider the size and quantity of jewellery you intend to store. Measure your jewellery and plan accordingly.
Q: How do I create compartments or drawers in my jewellery box?
A: You can create compartments by dividing the interior with wood dividers or using a simple box-within-a-box technique. Drawers can be constructed separately and fitted into the box.
Q: What kind of finish should I use on my jewellery box?
A: You can use stain, varnish, or paint to finish your jewellery box. Choose a finish that complements the wood and your personal style.
Q: How do I attach hinges and latches to my jewellery box?
A: Refer to the manufacturer’s instructions for attaching hinges and latches. Ensure they are properly aligned and secured for smooth operation.
Conclusion
Building a wooden jewellery box is a rewarding project that allows you to create a beautiful and functional piece that will be cherished for years to come. By following this guide, you can learn the necessary skills and techniques to craft a timeless treasure that reflects your personal style and craftsmanship. Remember, the key to success is patience, attention to detail, and a passion for woodworking.


Closure
Thus, we hope this article has provided valuable insights into Crafting a Timeless Treasure: Building a Wooden Jewellery Box. We thank you for taking the time to read this article. See you in our next article!