The Art of Resin Jewelry: A Comprehensive Guide to Crafting Stunning Pieces
Related Articles: The Art of Resin Jewelry: A Comprehensive Guide to Crafting Stunning Pieces
Introduction
In this auspicious occasion, we are delighted to delve into the intriguing topic related to The Art of Resin Jewelry: A Comprehensive Guide to Crafting Stunning Pieces. Let’s weave interesting information and offer fresh perspectives to the readers.
Table of Content
The Art of Resin Jewelry: A Comprehensive Guide to Crafting Stunning Pieces

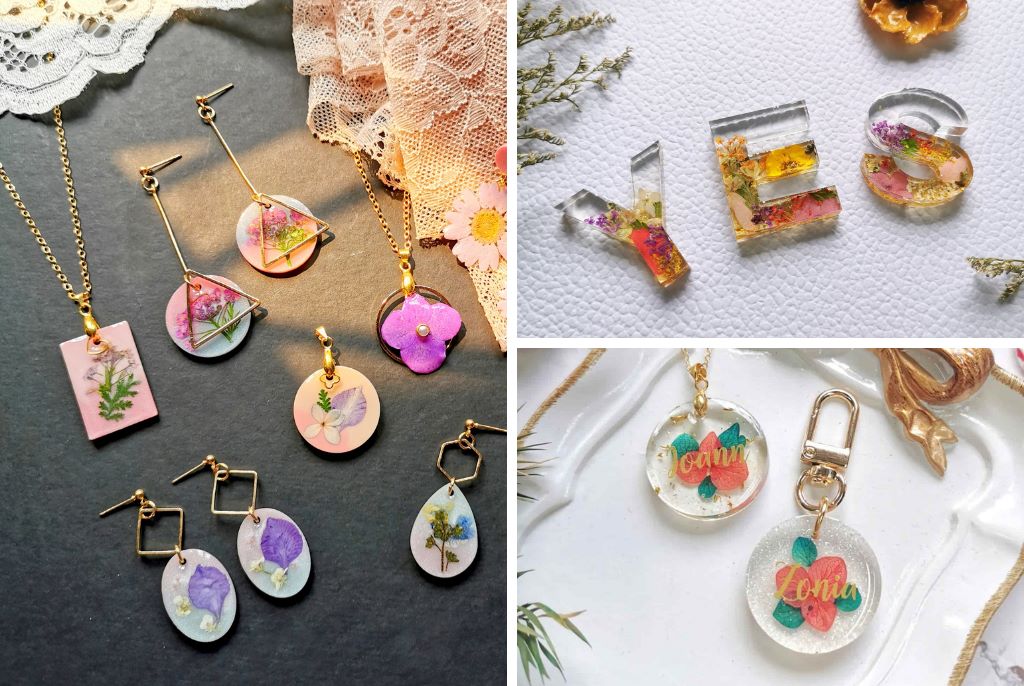
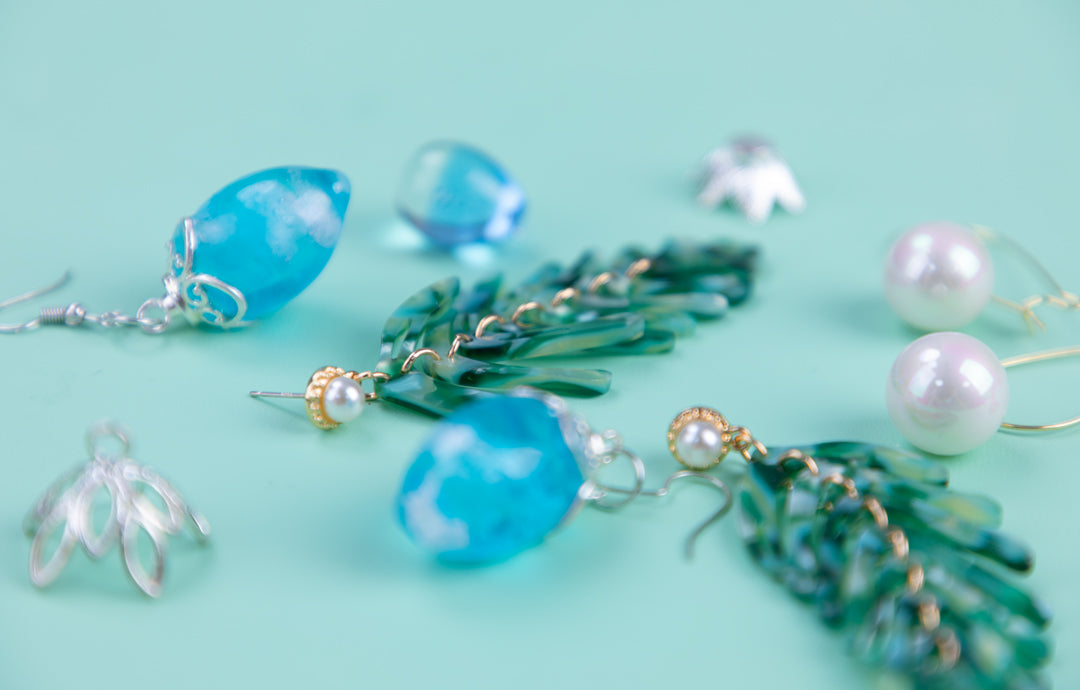
Resin jewelry has gained immense popularity in recent years, captivating both artists and enthusiasts with its versatility and stunning visual appeal. This durable and lightweight material allows for endless creative possibilities, enabling the creation of intricate designs, vibrant colors, and captivating textures.
This comprehensive guide delves into the world of resin jewelry making, providing a detailed roadmap for aspiring artists and seasoned crafters alike. It encompasses the essential materials, techniques, and tips for crafting exquisite pieces, while emphasizing the rewarding experience and artistic expression that resin jewelry offers.
Understanding Resin: The Foundation of Your Creations
Resin is a liquid polymer that hardens when exposed to air or a catalyst, transforming into a durable, transparent material. There are two primary types of resin commonly used in jewelry making:
-
Epoxy Resin: This type is widely favored for its durability, clarity, and ease of use. It typically comes in two parts – resin and hardener – which are mixed together to initiate the curing process. Epoxy resin offers excellent resistance to water, scratches, and UV rays, making it ideal for jewelry that will be worn frequently.
-
Polyester Resin: This resin type is known for its fast curing time and affordability. However, it is less transparent than epoxy resin and may require additional steps to achieve a smooth, polished finish.
Essential Tools and Materials for Resin Jewelry Making
To embark on your resin jewelry making journey, you will need a collection of essential tools and materials. These include:
-
Resin and Hardener: Choose a high-quality epoxy resin kit designed specifically for jewelry making. Ensure the resin and hardener are properly measured and mixed according to the manufacturer’s instructions.
-
Measuring Cups and Spoons: Precisely measure the resin and hardener using dedicated measuring cups and spoons. This ensures a consistent curing process and optimal results.
-
Mixing Sticks: Thoroughly blend the resin and hardener using mixing sticks. These are typically disposable and readily available at craft stores.
-
Silicone Molds: Silicone molds are essential for creating various shapes and designs. They are flexible, reusable, and offer easy release of the cured resin pieces.
-
Gloves and Mask: Wear gloves and a mask to protect your hands and respiratory system from potential irritation caused by the resin and hardener.
-
Safety Glasses: Protect your eyes from splashes and fumes using safety glasses.
-
Work Surface: Cover your work surface with a protective material, such as parchment paper or a silicone mat, to prevent resin from sticking.
-
Heat Gun or Hair Dryer: A heat gun or hair dryer can be used to gently remove air bubbles from the resin mixture.
-
Alcohol and Paper Towels: Clean spills and residue using rubbing alcohol and paper towels.
-
Jewelry Findings: Choose a variety of jewelry findings, such as earring hooks, pendant bails, and chain, to complete your resin pieces.
-
Decorative Elements: Unleash your creativity by incorporating decorative elements like glitter, mica powders, dried flowers, or metallic flakes into your resin designs.
Step-by-Step Guide to Creating Resin Jewelry
Now that you have gathered the necessary tools and materials, let’s delve into the step-by-step process of creating resin jewelry:
-
Preparation: Clean your work surface and ensure it is free from dust and debris. Prepare your molds by cleaning them thoroughly with soap and water.
-
Mixing the Resin: Carefully measure the resin and hardener according to the manufacturer’s instructions. Use separate measuring cups and spoons for each component.
-
Mixing Thoroughly: Pour the resin and hardener into a clean container and mix them thoroughly with a mixing stick. Ensure the mixture is completely blended and free from streaks or clumps.
-
De-airing the Resin: Gently heat the resin mixture using a heat gun or hair dryer to remove air bubbles. This step is crucial for achieving a clear, bubble-free finish.
-
Pouring the Resin: Carefully pour the de-aired resin mixture into your chosen molds. Ensure the resin reaches all corners and crevices of the mold.
-
Adding Decorative Elements: If desired, add decorative elements to the resin before it starts to cure. Carefully place your chosen embellishments into the resin, ensuring they are positioned as intended.
-
Curing the Resin: Allow the resin to cure completely according to the manufacturer’s instructions. This typically takes 24-48 hours, depending on the type of resin and the surrounding temperature.
-
Removing from the Mold: Once the resin has cured, gently remove it from the mold. If the resin is stuck, try using a small tool or applying a bit of lubricant to the mold.
-
Finishing Touches: After removing the resin from the mold, you can further refine your creations using sanding, polishing, or adding additional embellishments.
Tips for Creating Exceptional Resin Jewelry
-
Experiment with Colors and Textures: Resin offers endless possibilities for experimentation. Explore different color combinations, add mica powders for shimmery effects, or incorporate dried flowers for unique textures.
-
Use Quality Resin: Invest in high-quality resin designed specifically for jewelry making. This ensures durability, clarity, and a professional finish.
-
Proper Mixing is Key: Always follow the manufacturer’s instructions for mixing resin and hardener. Ensure a thorough blend to achieve consistent curing and prevent imperfections.
-
Avoid Air Bubbles: De-airing the resin is crucial for a clear, bubble-free finish. Utilize a heat gun or hair dryer to gently remove any trapped air.
-
Work in a Clean Environment: Maintain a clean work surface and avoid dust and debris to prevent imperfections in your resin pieces.
-
Practice Patience: Resin curing takes time. Allow the resin to cure completely before handling or adding further embellishments.
-
Explore Different Mold Options: Experiment with various silicone molds to create diverse shapes and designs. You can also create your own molds using clay or other materials.
-
Embrace Creativity: Don’t be afraid to experiment and explore your artistic vision. Resin offers a fantastic medium for expressing your unique style and creativity.
FAQs about Resin Jewelry Making
1. What is the best type of resin for jewelry making?
Epoxy resin is generally considered the best choice for jewelry making due to its durability, clarity, and ease of use. It offers excellent resistance to water, scratches, and UV rays, making it ideal for wearable pieces.
2. How long does it take for resin to cure?
The curing time for resin varies depending on the type of resin and the surrounding temperature. However, most epoxy resins take 24-48 hours to cure completely.
3. Can I use any type of mold for resin jewelry?
Silicone molds are the most recommended for resin jewelry making due to their flexibility, reusability, and easy release of the cured resin pieces. However, you can also experiment with other molds, such as those made from clay or plaster.
4. How do I prevent air bubbles in resin?
Gently heat the resin mixture using a heat gun or hair dryer to remove air bubbles. You can also add a few drops of alcohol to the resin mixture to help release trapped air.
5. Can I add glitter or other embellishments to resin?
Yes, you can add glitter, mica powders, dried flowers, or other decorative elements to your resin creations. Carefully place the embellishments into the resin before it starts to cure, ensuring they are positioned as intended.
6. How do I fix imperfections in resin jewelry?
You can use sandpaper to smooth out any rough edges or imperfections in your resin pieces. You can also polish the resin using a polishing cloth to achieve a high-gloss finish.
7. Is resin jewelry waterproof?
Epoxy resin is generally waterproof, but it is important to note that the jewelry findings or embellishments used may not be waterproof.
8. How do I store resin jewelry?
Store your resin jewelry in a cool, dry place, away from direct sunlight. Avoid storing it in extreme temperatures or humidity, as this can affect the resin’s durability.
Conclusion: Embracing the Art of Resin Jewelry Making
Resin jewelry making offers a rewarding and creative outlet for artists and crafters of all skill levels. From simple pendants to intricate statement pieces, the possibilities are endless. By following the techniques and tips outlined in this guide, you can create stunning and unique resin jewelry that reflects your personal style and artistic vision. Embrace the versatility of resin, experiment with different colors, textures, and designs, and enjoy the transformative process of crafting beautiful and enduring pieces.


Closure
Thus, we hope this article has provided valuable insights into The Art of Resin Jewelry: A Comprehensive Guide to Crafting Stunning Pieces. We appreciate your attention to our article. See you in our next article!